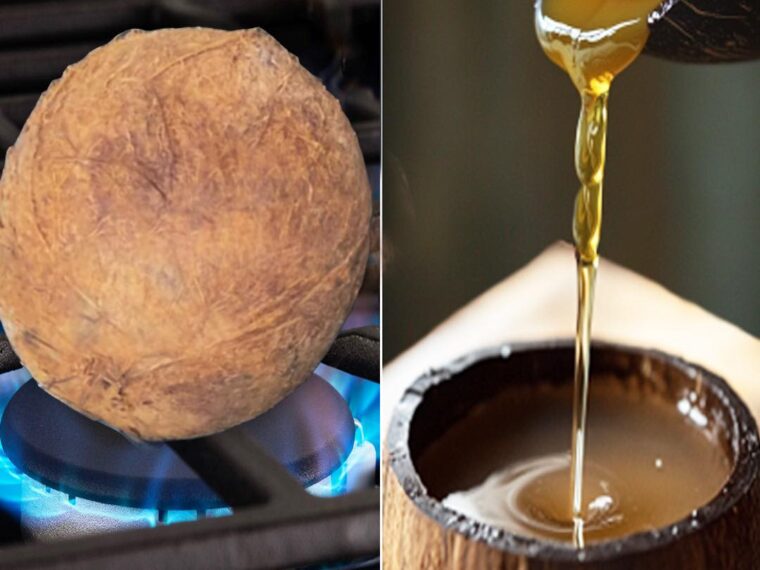
1. Preparing the Dried Coconut
Start with high-quality dried coconut. Look for unsweetened copra, which can often be found in health food stores or online. If you’re starting with fresh coconuts, you will need to dry the coconut meat before proceeding.
Drying Fresh Coconut:
- Remove the coconut meat from the shell and cut it into small pieces.
- Place the pieces in a dehydrator or spread them on a baking sheet in a low-temperature oven (around 150°F or 65°C) until fully dried (this may take several hours).
2. Blending the Coconut
Once you have your dried coconut, it’s time to blend.
- Measure the Coconut: Use about 2 cups of dried coconut.
- Blend: Place the coconut in a blender or food processor. Blend until it becomes a fine powder or paste. You may need to stop occasionally to scrape down the sides to ensure an even texture.
3. Adding Water
To extract the oil effectively, you’ll need to create a coconut milk mixture.
- Add Warm Water: Pour in about 1 cup of warm water for every 2 cups of blended coconut. The warmth helps release the oil more effectively.
- Blend Again: Blend the mixture thoroughly until it becomes a thick, creamy consistency.
4. Straining the Mixture
Now, you’ll separate the coconut milk from the solids.
- Prepare to Strain: Set up your cheesecloth or fine mesh strainer over a bowl.
- Pour the Mixture: Carefully pour the blended coconut mixture into the strainer.
- Squeeze Out the Liquid: Let it sit for a few minutes, then gather the edges of the cheesecloth and squeeze out as much liquid as possible. The liquid you collect is fresh coconut milk, which can be used in various recipes.
5. Separating the Oil
Once you have your coconut milk, it’s time to extract the oil.
- Let It Sit: Allow the coconut milk to sit undisturbed for a few hours or overnight in the refrigerator. This will cause the oil to rise to the top.
- Scoop the Oil: Carefully scoop off the oil layer with a spoon, being cautious not to disturb the milk underneath.
6. Heating the Oil
To ensure you have pure coconut oil, you need to heat the coconut milk.
- Transfer to a Saucepan: Place the coconut milk (with the scooped oil) into a saucepan.
- Heat on Low: Gently heat the mixture on low heat. Stir occasionally and keep an eye on it to prevent burning.
- Evaporate Remaining Water: As the water evaporates, you’ll notice the oil separating. This process can take anywhere from 30 minutes to an hour.
- Final Separation: Once you see the oil clearly separating and bubbling, you can remove it from heat.
7. Cooling and Storing
Once the oil is fully extracted, you need to cool and store it properly.
- Cool Down: Let the oil cool to room temperature.
- Transfer to Storage Container: Pour the oil into a clean, dry jar or bottle.
- Storage: Store your homemade coconut oil in a cool, dark place. It can last for several months.
continue reading in page 2